Pages

Friday, December 25, 2015

Joy to the World

Merry Merry Christmas!!!!!  Finally getting a minute to sit down, relax and visit crafty blogland.  And what a way to celebrate this marvelous day than with my take on Tim Holtz's December 2015 tag.  Wow!  Tim never ceases to inspire me to create.  Love his latest tag.  Check out a step-by-step tutorial here on Tim's blog.


My tag is a little different from Tim's.  I used Tim's Holiday Greens dies to cut some thin metal sheets from Spellbinders.  Some of the foliage was colored with alcohol ink and some got a little Picket Fence Distress Stickles treatment.


The pieces were arranged around a thin bangle bracelet to form the wreath. 


 As many of you know, I don't sew.  So I grabbed some embroidery floss and whip stitched the edges.  By the way ... love Tim's new snowflake stencil.

 I sincerely hope you having a marvelous Christmas.   May God's blessings and peace be with each of you during the holidays and throughout the New Year.

Hugs to you all -- Mary Elizabeth


Sunday, October 25, 2015

It's Alive!! Tim Holtz 12 Tags of 2015 -- October

Okay ... I've got to say it again.  I've had such fun playing with Tim's Monster die over the last few weeks.  He (the Monster ... not Tim) takes on new personalities every time I use the die to create him.  Love it!!!  In my last post, I showed off a rather surprised looking monster with an ill-fitting brain.  This time, he looks positively monsterish in Twisted Citrus and Seedless Preserves (gorgeous color combo) for my take on Tim Holtz's October Tag for 2015 .   Wow! 


Check out this intense monster stare!


I basically followed Tim's fantastic step-by-step directions on his October Tag blogpost.  The one exception is that I created my own collage tag background using some fantastic Tim Holtz Idea-ology papers and tissue tape.  Love the Formadhyde label and the handwritten notes on the use of cathodes and electrodes!    


I used Spiced Marmalade Distress Ink on a harlequin stencil over my collaged paper.  Then  I gave the entire background a coat of watered-down Antique Linen Distress Paint.  I distressed the edges and grunged them with some Hickory Smoke and Pumice Stone Distress Ink.   Finally I used my Hickory Smoke Distress marker to add some shadows and outlines around the harlequin pattern.


I added a remnant rub spider to go along with my Twisted Citron painted spider.  And of course, like Dr Frankenstein, I want my Monster to "Live" so I added this grunged and painted Word Stick to my tag topper of Seedless Preserves Distress Stained twine and Black and Cream Trimming.


 I seriously love my Monster creation. I'm going to enter him in this week's Simon Says Stamp Monday Monster Mash Challenge.  He will be in good company with the other awesome versions of the Monster created by the fabulous design team over there.  Please go drop by and see the spooktacular Halloween inspiration cooked up by the talented DT.


I'll leave you with a couple of other close-ups.   Wishing you a hauntingly happy Halloween!!  -- Mary Elizabeth


Saturday, October 17, 2015

Inept Dr Frankenstein ... Chiari Awareness Month -- A Little Late

I cannot believe it is mid-October already.  I've been swamped with work after recovering from a pretty terrible cold.  So please forgive me for not visiting your blogs.  It has taken everything I have had lately to get through all of my classes.  Fortunately, I have a day off for mid-semester break and I want to share a project that I intended to show in September.  As some of you know, I try to craft something each year for Chiari Awareness Month (which is September).  As you can see, I didn't quite make that deadline, but better late than never!  Actually, I think my Inept Dr Frankenstein Project really fits better in October with its Halloween overtones.


ConquerChiari.org
This is somewhat of an art journal/ mixed media piece to give you a little more detail about my life's journey and raise awareness of Chiari Malformation.  In the fall of 2011, I was diagnosed with a Complex Chiari Syndrome.  This syndrome is made up of a Chiari Malformation and some other complicating disorders.  The slogan "Too much brain to contain" is one that you often see associated with Chiari Malformation.  A Chiari Malformation Type I is when the cerebellar tonsils (The tonsils on bottom of your brain's cerebellum ... yeah ... I didn't know our brains had tonsils either until a surgeon said he need to cut mine!)  herniate through the hole at the bottom of the skull into the spinal column.  Basically this acts as a "stopper" in a flask and keeps your spinal fluid from flowing as it should from your spine to your brain.  This can cause a great many unpleasant symptoms ... primarily major headaches.  For more about the symptoms of Chiari, check out the One Page Chiari Malformation Fact Sheet put out by the Chiari & Syringomyelia Foundation.

When I saw Tim Holtz's Monster die, I immediately envisioned this piece.  Seriously, I know that Tim really wants to inspire us to create ... but I don't think he could have even imagined someone being inspired in this manner :)  Oh well.   I created my monster with some grunged Co'ordinations cardstock in greens and grays.  I gave it some dimension by adhering it to some thick cardboard and putting some cardstock around the edges.  I added my own grunged "bolts" made of screw-top brads and nuts. Some Glossy Accents were added to the eyes and "stitching" on his neck.   As you can see below, my Inept Dr Frankenstein has found a brain that was too big for the Monster's head.  So back to the drawing board Dr Frankenstein.  You should always measure twice and cut once!  Since my Dr Frankenstein is a bit on the bungling side, I added a "This Side Up" Remnant Rub to remind Dr F of which side was up when he replaced the top back on his Monster.


The brain  ...  is actually mine.  I do believe I have more images of my lovely brain than I have photos of me.  This is a clipped image from one of my MRI's.  I printed it out, added some color (to give a bit of that "gray matter" look), and fussy cut it to adhere to my Monster's head.  Hopefully you've noticed the stamped skull in the collaged background.  Chiari Malformation isn't really a brain disorder.  It's a skull disorder that manifests in a brain problem.   The bottom of my skull is too small.  My brain is actually normal size, but my poor too-small skull just could not contain it all.  (Alas ... not a problem of too big of a brain :) )


I used the back of a burlap canvas to do my collage. I cut away the corners of the collage to reveal the edges of the burlap there.  The collage was created out of several of Tim's Idea-ology papers, tissue tape, more Remnant Rubs and an "Electrical Shock Hazard" warning label from my dehumidifier (It's above the "i" in "contain".  I thought this would be appropriate for an Inept Dr Frankenstein).  Paper edges for pieces in my collage were given a vintage feel by inking them with various shades of gray, black and brown.  The entire collage was given a wash of watered down white acrylic paint.  I grunged the side panel edges with Walnut Stain Distress Ink and matte multi medium.  The top and bottom got a coat of Black Soot Distress Paint.  I used some black archival pens and Black Soot paint to create the "rips" and "tears" around the panel edges.

Before I adhered my letters and Monster to the collage, I used Wild Honey, Scattered Straw, Spiced Marmalade and Vintage Photo Distress Stains with Matte Multi Medium to create a lightening bolt (which powers Dr. Frankenstein's life-giving machine).  However, this lightning bolt is right under the letters that spell "CHIARI" and it really represents the way Chiari struck my life like a bolt of lightning.  Seriously, I went 29 years with no symptoms.  I was healthy and having a great time in graduate school.  I was getting ready to start my dissertation.  Then from out of the blue, while running up 6 flights of stairs, a pain in my head stopped me dead in my tracks.  It was the worst headache I had ever had.  No matter how much over-the-counter pain meds I through at it, I could not get it to stop.  I don't remember much from the class that I went to.  I do remember that I could not drive myself home after that class.  Many thanks to my officemate, Alan, who drove me home safely that day!   The next day, the student health clinic doctor diagnosed me with migraines.  I spent the next 15 years looking for answers as I added new and bizarre symptoms to a list of seemingly unrelated illnesses.  Joint aches, ringing ears, stomach ailments, respiratory problems, heart-related problems, weak muscles ... it went on and on.  That was a very long time to go undiagnosed.  Looking back now, I can see how every single one of these symptoms were neurologically linked to the squeezed spinal cord, compressed brain and cranial nerves, and limited cerebral spinal fluid flow of my Complex Chiari Syndrome.

I think the worst symptom of Chiari Malformation and the related disorders that I have is that it is an "unseen" illness.  You look fine!  You tell people about all the problems you are having, but there really is no indication that anything is wrong.  I've literally had doctors, friends, and family members say that they thought it was all in my head.  When you are in so much pain and people don't believe you, you get very depressed.  I am thankful for amazing parents who supported me when no one else would.  I am also thankful for good friends who encouraged me to keep searching for answers and helped me make sense of everything when I finally did find what was behind all of the problems.  More than anything, I owe the fact that I have my life back right now to a brilliant neurosurgeon in NY, Dr Paolo Bolognese of the Chiari Neurosurgical Center, who doesn't accept the status quo of Chiari treatment and keeps looking for ways to make Chiari sufferers' lives better.  He performed both of my surgeries and I'm amazed at the quality of life I have now!!


Ok ... back to the art :)  After I adhered my 3-dimensional Monster to my canvas, I knew I needed some letters to stand up to the presence of the monster.  So I started with Tim's Grungeboard letters to spell CHIARI.  I painted them with Brushed Pewter Distress Paint and then covered them with a seriously thick layer of Crackled Accents that I mixed with Seedless Preserves Distress Stain (my favorite purple of all times ... and purple is the color for Chiari Awareness).  When the crackled mixture dried on the Distress Paint, it had some great cracks in it and OH what a yummy color!!!  It looks like candy!   But I wanted more texture, so I bent the grungeboard letters and made the cracks bigger.  Then I flaked off some of the purple crackle mixture altogether to expose the metallic paint underneath.  I used some alcohol ink to tarnish the exposed silver paint.  I got another layer of unpainted grunge letters and layered them under the crackled letters to give them more height on the canvas.  Then I used a Black Soot paint and silver pen to give some shadows and make them pop on top of my lightning bolt.


The other letters are also some of Tim's grungeboard letters that I had in my stash.  I colored them with Distress Paints (you might notice the gorgeous Twisted Citron on the word BRAIN!) and grunged them with sandpaper and Walnut Stain Distress Ink.   I again used a double layer of letters for the word BRAIN to make them pop.  The number 2 is one of Tim's Idea-ology metal numbers that I treated with alcohol inks.


I so very much enjoyed making this.  Love the Monster die Tim!!  I'm going to enter it in a few challenges:

Simon Says Stamps Wednesday Challenge:  Color Inspiration (You need to check out the gorgeous fall color board given for inspiration!)

Country View Challenges October - #32 - ADD some texture

A Vintage Journey:  Art Journaling with Tim (I know this is a bit of a different format than my art journal.  I hope that's ok.)

Frilly and Funkie's Autumn Splendor Challenge (More gorgeous fall inspiration!!)

Well ... that brings me to the end of another long post. At last count, there are approximately 2 million Chiari patients in just the US alone.  It's becoming much easier to diagnose due the use MRIs; yet, so many people still are suffering without a diagnosis.  Even if you get a diagnosis, your journey is only beginning.   I want to dedicate this post to a friend of mine, Stella, who is suffering from this same illness.  I met Stella in a NY hospital in 2012 as we both recovered from Chiari-related surgeries.  Stella has had a much longer and harder journey to walk than I and is currently in a halo while her bones get strong enough to mend from her last surgery.  Her bones were so soft that a screw from her halo came out while she was sleeping ... twice!  This is for you Stella ... I'm praying for you!

Thanks for dropping by everyone and letting me share my story.  I honestly hope to get back to visiting crafty blogland soon.  I miss you all.   --  Mary Elizabeth

Wednesday, September 30, 2015

Frosted Pumpkins -- Tim Holtz September Tag for 2015

Not a great deal of time to blog today.  I just barely made the deadline for my take on Tim Holtz's September Tag for 2015.  Please check out his blog for the amazing details of his gorgeous tag.


Here are a few photos of my tag.  They aren't that great.  We have been inundated with rain lately so no outdoor photos. 


Sorry to throw up pictures and run.  I have to grab some sleep before life starts its chaotic journey again.  Live in the moment ... and realize ... good or bad ... how amazing each moment is.

Mary Elizabeth

Thursday, September 24, 2015

Life ... Make it Count

I'm so very excited to be a Guest Designer over at Frilly and Funkie today!  Shelly has chosen such a perfect theme for September -- Chalk it Up.  As a mathematics teacher, I use a lot of chalk.  Now that school has started back after a great summer break, I'm up to my eyeballs in it.  So it really is fun to put that chalk to use in my crafts as well as in my classroom :).  And what's more perfect for a chalk-themed project than a back-to-school tag.
 
I started my tag by taking a piece of Tim Holtz’s Ideology paper that had the alphabet on it for the background.  I adapted Tim’s “chalkboard” stamping technique for use with a stencil. (You can find a complete tutorial of Tim’s technique on his November Tag for 2013 blogpost.)  For my stencil adaptation, I began by applying Distress Embossing Ink through Tim’s Numbered stencil with an ink blending tool.  I sprinkled on Ranger Ink’s frosted crystal embossing powder over the stenciled numbers.  I heated the embossing powder per Tim’s directions on his blog.  Then I put the stencil back over the embossed numbers and applied white chalk over through the stencil on top of the frosted crystal embossed numbers.  A cotton swab made the perfect tool for rubbing in the excess chalk through the stencil.  I then removed the stencil.  I was so excited because only the stenciled image had chalk on it! (Usually I get chalk everywhere on a project like this!)   A thin black marker was used to provide some shadows around my chalked numbers.  What a really cool background for my school-themed tag.


 s
I stamped three apples from Tim Holtz's Mini Schoolhouse blueprint stamps on watercolor paper.  I colored them with Distress Markers and a water brush detailer.  After that dried completed, I fussy cut the apples and gave them three coats of Ranger’s Melt Art Ultra Thick Embossing Enamel (UTEE).  Love this effect!  


I also fussy cut some of Tim’s Found Relatives (that looked like they were dressed up to go back to school).  I added the relatives and apples to my tag with foam adhesive squares. Some tissue tape and a pencil stub tag tie topped the tag.

 And with my love of teaching and mathematics, I gave a little play on words for the sentiment.  I always love the beginning of the school year.  It has such promise and you really can make the semester as great as you want it to be.  I wanted my tag to remind students to make the most of the school year with my "Life ... make it count" sentiment.  Of course ... make it count can be taken in a mathematical sense as well :).

Oh ... I almost forgot ... I do want to enter this in the Numbers Challenge over at Country View Challenges (thanks Allison!!).  


Thanks Frilly and Funkie for the opportunity to be a Guest Designer.  I have had so much fun making this chalked-themed tag!   Hugs to you all -- Mary Elizabeth

Sunday, August 30, 2015

An Early Christmas with Tim ... Holtz August Tag for 2015

First, I would like to say thank you for all of the wonderful comments and support I received on my last post, Time Mends Broken Hearts.  Art, indeed, is therapy :) And I'm so grateful that my crafty friends are here to walk the journey with me. Now ... I hope you all have had a great weekend.  I have!!  I managed to carve a little time to create my version(s) of Tim Holtz's August Tag for 2015.  Wow!! Tim seriously outdid himself this time.  I've been checking out everyone else's take on Tim's tag and they are really spectacular.  I won't go into all the details because Tim's tutorial is so great.  I sincerely suggest that you drop by and try to follow his step by step process.  His tutorial is an awesome way to utilize a variety of tools you may already have in your stash.

Since I am so terrible at getting Christmas cards and tags made, I decided to start early and Tim's August techniques really lend themselves well to holiday wishes.  I actually ended up making two tags again this time.  I thought the first one was a little too busy, so I create a second one and I really like it.  Above you can see my second tag.  I followed Tim's steps exactly with the exception of splattering with paint at the end.  I love the holiday "found relatives" too much to splatter them :). 
 

 The background is some of Tim's Christmas Ideology paper (with Christmas carol sheet music).  I used his Block Holiday Words Thinlits.  To color the die cut layer, I used Walnut Stain, Wild Honey and Peeled Paint.  I used a heavier bristled paint brush to apply the gesso and matte multi medium.  This gave me a little more texture to work with when I "grunged up" my tag at the end.


I grabbed a small clothespin adorened with a Christmas tree that I found in the dollar bins at Michaels for my "tag tie".  I decorated it with a remnant rub and used it to attach an Ideology charm and one of Tim's Holiday Greens die cuts to the tag.


 I had to end with a close-up of this little boy with Santa.  I was always afraid of going to see Santa at Christmas.  (Hence the "brave" charm on the tag!)  However, when I saw this found relative, I got the feeling that Santa had just told him that he had better straighten up his act and be good or else he may get coal in his stocking!

Here are a couple of other details to note. I used Tim's musical score stamp from  his Joyful Song set on the left of the tag.  I also fussy cut the "holiday lights" box front from some of Tim's Ideology holiday papers.


I decided to include the first version of this tag.   I do like it, but I found the stamping and remnant rubs on the front were just a little too busy for me.  I loved using Tim's snowflake Movers and Shapers die to add the snowflake to the die cut overlay.  Snowflake pattern paper  was used as the background layer.  I went a bit lighter with the inks and "grunging" because it is a snow-themed tag.  I did use some silver acrylic paint for the "splatters here.  I didn't add any charms because it was so busy. 


 I will end this post with a pic of both tags side by side for comparison.  As usual, it was such a blast to create these.  Thanks Tim for a wonderful August inspiration tag and the time you took to share your creativity with us!  -- Mary Elizabeth


Tuesday, August 25, 2015

Time Mends Broken Hearts

Some background info:

Soooooooo ... this post is  part journaling and part craft blogging.  I've been thinking about this project for quite some time now and never really found the right inspiration or the right time to do it.  Well everything all came together over the last couple of weeks.


I think most of us by now have experienced some sort of deep hurt in our lives ... the kind of hurt that you cannot just forget about next week.  I've spent some time recovering from one of those painful experiences myself.  With the added pain (literally) of my Chiari Malformation and associated illnesses, as well as healing from multiple major neurosurgeries, I've rather run away from the emotional pain instead of facing it.  I've experienced more anger than healing and that's just added to the weight of this burden.

So now that I'm healing physically, getting stronger, and feeling better than I have in years, it's really time to face the heart brokenness and nurture the healing process there.   As I was walking this journey over the last couple of weeks, I saw the unique A Stitch in Time ... with a Twist Challenge hosted by Sue over at Frilly and Funkie and everything sort of came together.  Over the last few years, I had been thinking about how some of these really industrial-sized hurts take some industrial-strengthed mending over a great deal of time.  In my mind's eye, I saw wire being used to stitch the broken heart together.  As I thought about the time it takes to heal, I began to envision the springs of a clock as the wire thread and the hands of the clock as the needles used to do the stitching.  So when Frilly and Funkie's challenge came along, I knew it was time (no pun intended) for this project.

It has been an inconvenient time to be so terribly inspired to create:)  Last week, I started teaching classes again for Fall semester at our local university.  I have been very busy.  I'm still working 3 times a week with a personal trainer to build up my strength and stamina.  In the meantime, I crammed as much creative energy into every tiny bit of free time I had over these past few days.  And it has been awesome!!!!  As I've made a beautiful mess downstairs (trying all sorts of different techniques and ideas to bring what was in my head to life in mixed media), I've also made a beautiful mess unraveling the angry tangle of my heart.  It's been such a tiring, but very good experience.

To top everything off, my daily devotions (from In Touch Ministries by Dr Charles Stanley out of 1st Baptist Church of Atlanta) over the last two days have really just confirmed that this is the right project for the right time.  Monday's devotion was entitled God's Gift of Forgiveness.  Here are some highlights: "Motivated by love, God provided a way for our sins to be forgiven. ... God’s will is that we, as forgiven people, show mercy to those who wrong us—to the same degree that He forgave us in Christ.  ... Depending on how much hurt we’ve experienced, we may require time and healing before we can truly forgive. "  Today's devotion was entitled A Lifestyle of Forgiveness.  I think you get the picture :)

Thanks for letting me share with you a little of the "behind the scenes" details for this project.  Now on with all things crafty!

The project:  (I apologize for the picture heavy post!)

I started with an old, rusted, broken, plywood-backed clipboard that my mom found buried in my dad's stuff this summer.  When she saw it, she knew I would appreciate the vintage"found treasure" underneath the cobwebs and dust.


I dusted it off and began by using some multi medium to adhere a page from one of Tim Holtz's Ideology paper stashes.  The paper has calendar pages for January thru December printed on it.  It definitely fit my "long time" theme and made a great backdrop for all my other elements.  Some tissue tape was added on all for edges of the board.  I gave the background board a good wash of water mixed with Picket Fence Distress Paint.  Next I flipped through my Tim Holtz Found Relatives and came across a boy and a girl who did not look terribly happy in their picture.  I thought that perhaps they hurt one another and were suffering broken hearts.  They became part of my collaged background.  Now the entire clipboard background was given a nice coat of matte multi medium.


When that dried, I wanted to add some crackle paint over the background to give it a more rustic feel, so I swiped on some Picket Fence Distress Crackle Paint over various parts of the clipboard (even managing to smear some on the rusted clip at the top).  It gave a really nice fine crackle finish to the painted portions.  I wasn't really happy with my black and white background, so I began to add some color.  I mixed matte multi medium with Fossilized Amber Distress Ink  and Brushed Corduroy (LOVE this color combo) to create a warmer vintage feel to the background.


Now to add my elements.  I began with finding my clock.  Tim Holtz has an entire page of clock faces in one of Ideology Paper Stashes.  I grabbed that page and found a clock face to use.  I cut it out and then rummaged in my craft stash to find something to serve as the frame for the clock face.  Unbelievably, I found a metal ring that was the perfect size.  I used alcohol inks to grunge the gold colored ring and then adhered it to my clock face with matte multi medium.


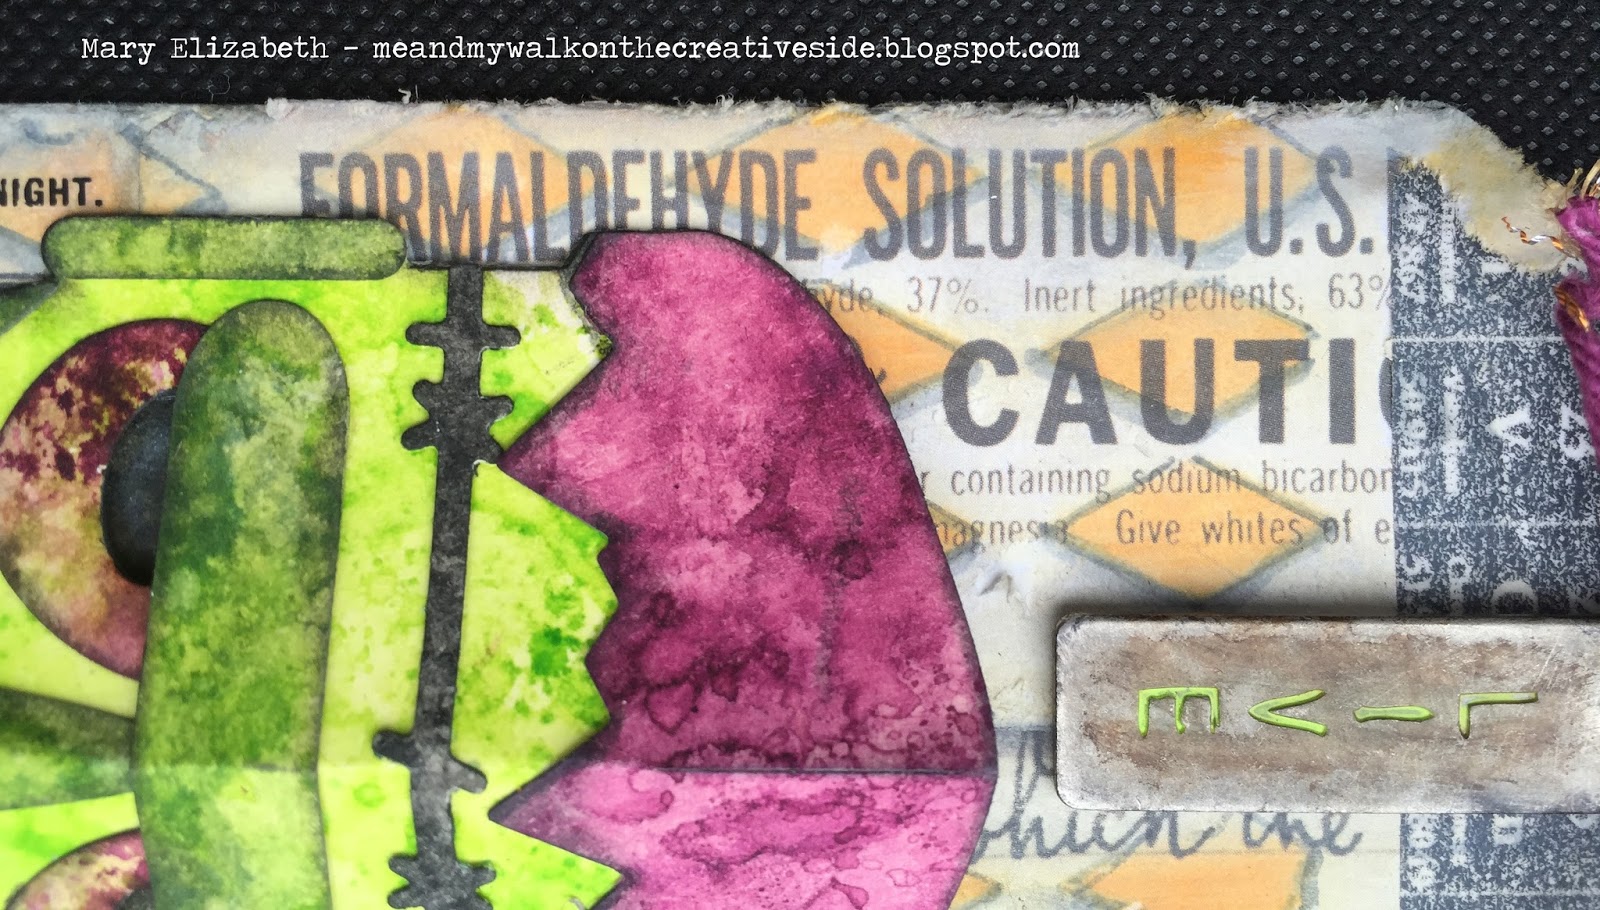
 I wanted something 3-dimensional, yet cut-able, for my heart.  A cork square was perfect.  To go along with the stitching idea, I decided to cover my heart with fabric.  I remembered I had some burlap "paper" in a dark red from Christmas.  I cut out my heart shape (including the "cracks) and covered it with the burlap paper.  I didn't like the rough cork edges on the outside of the heart, so I spread on a thick layer of modeling paste around the outside edges.  (I really liked the rough cork as the texture for inside the "cracks" of the heart.  When that dried, I added some blots of Ginger alcohol ink in areas around the modeling paste edges and then used matte multi medium mixed with Aged Mahogany Distress Ink to add overall translucent color.  A black Sharpie pen was the a great way to add some bold outlining to the burlap paper surface.


I have a clock and a heart ... how do I use the clock hands to sew up the broken heart?  Back to my rummage in my stash.  I found a suitable-sized big and little hand for my clock and some heavy gauge black jewelry wire to serve as my clock spring/thread.  I added a few small gears to the center of my clock face and I was in business.  After wrapping the jewelry wire around a paint brush handle (to create the "springs"), I started to map out the path that each of my clock hand needles would take for their respective heart cracks that needed mending.  I used a my trusty black Sharpie to make the "holes" where the needle entered and existed as it slowly sews the heart back together.  I didn't actually "sew" with the wire :)  I cut small pieces of wire to create the stitches and lightly tapped them into pre-cut holes across the "cracks" to make my wire stitches.  Then I attached a "spring" section of wire from the clock to the heart (one for each clock hand and respective crack).  At the end of the row of stitches on  a given "crack", I created a hole for the clock-hand needle to come out for the next stitch and a new hole on opposite side of the crack where the clock-hand needle would stab into the heart to create the new stitch.  Fun!


I began the job of choosing my letters for the phrase "time mends broken hearts) and started placing them on my the clipboard background.  I realized that the corners looked a bit empty.  A ha!  I can use my new Tim Holtz Mixed Media framelits to create a sort of "caging" around the edges.  I grabbed some silver foil cardstock and cut out four of the honeycomb framelit corners.  I ran them through my Xyron Creative Station to put some adhesive on the back of these intricate diecuts.  Nice.  I added them to the four corners of my clipboard.  I used a Black Soot Distress Marker to create shadows on the clipboard within the honeycomb pattern.  Cotton swabs were used to smudge the marker and helped me wipe away any excess color.  Awesome!


Ok ... the corners don't look so bare now :)  On to the letters for my words.  I used some foil covered chipboard letters for the word TIME.  Again, I wanted a more rustic feel to them, so I covered them Ginger and Latte alcohol inks and then embossed them with Walnut Stain Distress Embossing Powder (that I applied in small sections with Ranger Ink's Perfect Pens).   They were a little dark.  So I gave them a white "shadow" with a white Sharpie Acrylic Paint Pen (great tool!).  I came back with some matte multi medium mixed with Antique Linen Distress Stain to tone down the white paint. 


I used some Tim Holtz Ideology letters for the remaining words.  For MEND, I used Tim's Label Letter stickers on some scrap paper left over from another project.  The word BROKEN was one of my favorite experiments.


I took the letters from Tim's Alphaparts and painted them with Antique Linen Distress Paint.  Once that was dry to the touch, I applied a thick coat of Clear Rock Candy Distress Crackle Paint.  After it dried, I grabbed some Cranberry alcohol ink and applied just a drop at the corners of the letters.   The ink spread through the cracks of the clear crackle paint.  I learned to apply small dots of alcohol ink with the tip of a toothpick (instead of applying directly from the bottle) a little too late to be more deft with the ink application :).  A Black Soot Distress Marker was used to give some shading around these letters.


Finally, I decided that I wanted my heart mending to be "motivated by love".  I took some of Tim's grungeboard letters for the word HEARTS and painted them with Antique Linen Distress Paint.  I used Coffee archival ink to stamp some of the letters with quotes involving Love from some of Tim Holtz stamp sets.  I embossed the stamped sentiments with clear embossing powder. The letter "e" was stamped with a clockface.  I used some of Tim's Remnant Rubs (again involving Love) on the remaining letters.  Distress Markers were used to give a little color to the letters and a black Sharpie was used to give most of them a quick outline.  I did a layered presentation of the letters and adhered them to the heart with multi medium.


I think that's it!  I apologize for the very long post.  Forgive the typos.  I will try to edit it tomorrow.   Since this mixed media project was such a labor of love, I'm going to enter it in a few challenges. 

Frilly and Funkie's Stitch in Time ... with a Twist Challenge

Craft Stamper Magazine's 'Take a Technique':  Pens and Pencils Challenge

We Love to Create Challenge #17 :  Anything Mixed Media/Creative/Inky Goes

Mixed Media World's: Gorgeous Textures Challenge 

 Art Journal Journey:  Time

Hopefully, you've had some time to create heart-felt art this week.  I'll try to catch up on my visits Crafty Blogland visits this weekend.  Hugs to you all -- Mary Elizabeth